Miyerkules, Agosto 28, 2013

Mini Series!

This week I've decided on a new mini project!  I will post a character asset for games complete with animation and png sequence renders.  Here's my initial concept:

A footman

Concept was done in a day.  Modeling and UV to follow will be for one day.  Texturing and Rigging each for one day.  Animation sequences: idle, attacks, walk, run, special move will all be done with minimal frames--6 to 15 frames.  Maximum time to finish the animations is half a day for each 15-frame animation.

Sabado, Hunyo 15, 2013

Axe Grunt [update 2]


Okay...not too fond of the results.

Texturing should be a whole new other challenge.  I thought I could get away with some baking and monotonous colors.  It's a whole new discipline that is very unfamiliar.  Painting is fun to do but when I had my maps baked, I felt restricted that I couldn't find a way around small missteps as in seams in the texture.  I spent a grueling 3 hours sculpting in details, baking, and "coloring" the texture.  Grunt ended up looking more realistic than stylized.  I have failed in creating a look I wanted and got carried away with sculpting.

I must admit that I got intrigued with how to do stuff that I let the time pass experimenting and doing things I haven't had any experience of.  I could have just stuck with the easier way which is photo manipulation and some freehand painting as it doesn't require sculpting and baking.  It was fun though and I feel there will be more projects that will need those but in this particular one, time is more of the priority.

That said, I would go on to rigging and skinning the character first before I get back to texturing it again--maybe do a remake of the texture.  Things didn't pan out well but I would still give the 3 hours spent back as I get back on track just to know if the challenge can still be completed following my original plan in 8 hours or one working day.

Linggo, Hunyo 9, 2013

Axe Grunt [update]

Here's an update of the Axe Grunt.  I went on to try quick texturing by using the 3D paint tool in Maya. It does well enough to block off some colors but it doesn't fully give me the detail that I wanted.  It was still a quick way to see how the model will look with colors and a great way to find out how effective the UV layout is.  I noticed a lot of tweaks to the UV should be done to achieve a more effective texturing but before I went on and did it, I proceeded to doing a quick sculpt of the model to have a source for the texture.  I would then bake normal maps or bump maps in to a color map together with ambient occlusion maps.  I am not good with colors or painting that's why this method appeals to me more for the texturing process.

Sculpting in some details was fun but the tools and navigation needed some getting used to.  I used Sculptris Alpha 6 for this.  I am also hoping in the future that I could paint in colors using the freeware as Sculptris has a paint mode. 
Here's my initial sculpt:


With this sculpt, I exported an .obj file to be used as a reference and source of the normal map baking. When I put the high-resolution mesh in Maya, I had to adjust the low-poly model to suit the silhouette better.   

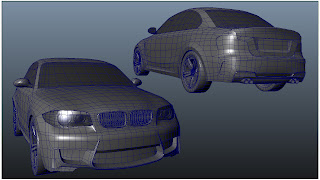
working low-poly mesh. 998tris

I then went on to finalizing the UV layout so I could start baking the texture maps.


In high quality hardware render mode in Maya:
with normal and ambient occlusion as diffuse. 1024x1024

Now that I know the method is good, I'll go on to finalizing the sculpt and putting in colors and more details from images to complete the texturing process.  So far I've spent 2.5hrs in this update and 4hrs total in the project.  I feel it would take me 1.5-2hrs to finish texturing so I would need to rig and skin the character in around 2hrs to stay in the 8-hour period of the 1 work day challenge I set upon myself.

Linggo, Hunyo 2, 2013

1Day Asset Challenge #1 - Axe Grunt

Finally another post!  I got motivated to get back to my personal works as I try to build up my portfolio.

I am more of a 3D modeler than an illustrator or concept artist so I figured to fill the blog with more 3D works.  On the other hand, 3D assets take time to do so I made a challenge for myself to do one in just a day--8-10hrs from scratch.  Along the way, I may reuse some models I have but for this one, everything is done from scratch and I started with blocking it all in--skipping the concept 2D art.

I decided to go with a generic grunt and in this particular challenge the specs are:
1000 tris
1 512x512 diffuse map
rigged

Here are my WIPs:

Started with cubes then went to plane modeling from neck up.
the first 20min.  544tris and counting...
 Tweaks for silhouette/ added more verts. Generally added muscle contours.
now at 44min around 830tris
Tweaked proportions--enlarged hands, longer legs.  Added accessories and weapon.
1hr in...980tris, already with some uv projections
 Detailed the face.  More accessories.  Pulled some verts to suggest clothing in silhouette (boots,sleeve).
final WIP for tonight 988 tris, a total of under 1.5hrs (failed to monitor my exact time as I went for a lot of breaks)

I'll continue this tomorrow.  My target is to be finished with the model and uv by the 3rd hour.  Texturing will follow and is expected to take up 2hrs  leaving rigging with 3hrs.  I'm not so excited with texturing but it's worth a try.   This'll be one of many newer 3d works for my portfolio.

Lunes, Mayo 13, 2013

Adventure Time!

This weekend I started working on a personal project with the specs and instructions from an ongoing contest.  It caught my interest as the workflow covers from modeling to animation of a character.  I'm not sure yet if I'll join but I rather do either way than just let it pass.  My first step was to create a concept art by collecting various reference photos.  Also, start to block in some silhouettes.  Minutes later, I ended up sketching nude body types to show the pose better.  In addition, I wasn't really sure of what the character has on so I couldn't make myself block in some shapes yet.  Here's the initial WIP:


Next, I channeled my inner fashion guru for her getup--something I think I'm horrible at.  Here's what I've come up with along with the face and other tweaks:


Based on careful thought, I wanted my adventure character to be a strong and able woman built for extreme challenges.  She's essentially an adventurer who thrives in thrilling and dangerous ways of retrieving artifacts. Let's just say she's got more brawn than Lara Croft and charges at obstacles head on.

This will have to do for now. One more pass in concept art and I think I'll proceed to blocking it off in 3D. 


Sabado, Marso 30, 2013

It's Aliiive...still

My treant--revisited.  Added lower body and some thick branches on its back.  I made it look lesser of a human now--decided to go with a T-Rex kind of foot as it resembles roots of a tree.

Finally went on to paint in some colors instead of just grays but it's apparent I lack in that area as it still looks monotonous.  Maybe next time I'll put in some backgrounds or decent warm or cold lighting instead of default shadings but for now this will have to work.

Adjusted proportion to make it look more compact rather than slim and tall.  I want this treant to look more like an individual that look over the woods rather than a tree that came to life.

I had fun revisiting this piece.  This is going to be fun in sculpting but right now I'm not up for it yet as I get more interested in painting and 2D art.

Linggo, Marso 24, 2013

Working with poses


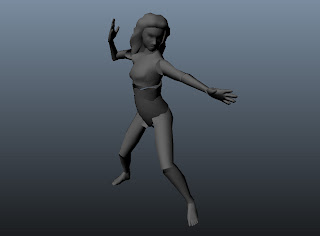
This Lara Croft WIP was meant for the Tomb Raider Reborn contest in deviantart.com but unfortunately I started late and couldn't meet the deadline.  I do hope to come back to it for practice and to finish it.

I'm glad though I got to try a technique that makes poses in drawings more manageable or modular.  I hope I made sense with that.  The technique I tried was:

  1. creating a 3d model of desired proportions (in my case, a girl/woman)
  2. rigging the model to be able to pose it in any way easily along with the camera for choice angles.
  3. capturing screenshots from the 3d program view or rendering it into an image file.
  4. tracing or overlaying the screenshots on photoshop and start drawing in the shapes
The process took long but from now on, I already have a ready file to go back to to get the poses I like to be used in my 2d artworks.  It's a lot more convenient now and I won't have to worry a lot about proportion, perspective, and foreshortening that much--it can initially be set in the 3d program.

Here are some screenshots I prepared for Lara:


Of course it would be much better too if you had modeled or skinned the model in a way that they wouldn't breakup but in this case, I am able to achieve what I wanted with those rough poses and silhouettes. Plus, it's quicker to prepare the posable 3D model that way.

Here's my most recent WIP that I used the technique on:

Now this one I also used picture reference in conjunction with the 3D model screenshots.  And I constantly tweaked parts as I go on.  It's fun trying out these kind of workarounds to make things easier; it saves your energy for the other more challenging steps--for me--like shading. 


I am a WIP--aren't we all?


My early bald guy drawings.  This is how I draw or paint before.  I have always been fond of drawing full bodies because I get to learn more about anatomy and in the end, play around with it using different styles.  I often distort my drawings to make it more fun to draw.
Of course eventually I learned more advanced drawing and shading from experience and tutelage of my colleagues.  I didn't get much time to draw when I was working but there are rare times my friends and I manage to the some drawing sessions and that's where I started to learn more.  Here's how I do my 'bald guy' drawing around two years after:

 That's around 2 years ago.
SpartanRobot-inspired from a toy
 This one was just sketched quickly last Christmas time.

I have many WIP in my pc and in this blog but it doesn't mean I don't finish what I start.  It's just that rendering a 'finished' look on it is not my goal every time.  Often, my goal is to practice and focus on some parts to more like experiment and experience.

I hope the more recent works I start though get to be worked on until they reach 'print quality' for books or magazines.  Hey I can dream too. And that's also a work in progress. :)


Sabado, Marso 16, 2013

Martes, Marso 12, 2013

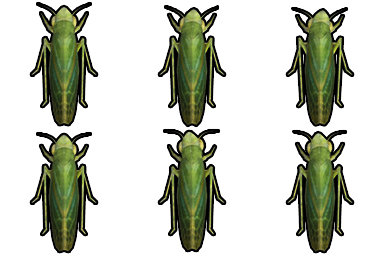
My Little Bugs of Old before I went to work


May 2009 - Almost four years ago! I believe this was during a time where I was just waiting to march for the my multimedia arts diploma.

These were meant for an indie mobile game that never really got off due to time constraints, lack of game design, and ultimately, concrete ideas.  Nonetheless, it was fun doing and was quite and experience.  Each animated .gif only have up to 6 frames of looping animation.

They were modeled, rigged, animated, and pre-rendered in Maya.  Texturing and other filters done in Photoshop.